Concrete staining is a quick and cost-effective way of turning a boring concrete surface into an attractive patio. But though stained concrete is lasting, it can still be prone to damages which result from poor maintenance, weather variations, and use over time. Some of the common problems you’ll encounter include the concrete surface developing scuffs, scratches, discoloration, and loss of shine. The good news is that there’s something you can do about it to restore your patio floor into an elegant surface again.
At Southside Concrete Polishing we help homeowners transform their uninteresting concrete patios into vibrant surfaces. Sometimes all you require to restore an outdoor stained concrete patio is applying a fresh concrete sealer while other times it needs more work to achieve the beautiful concrete surface you desire. Here’s a step by step guide on how we do it:
What is Needed to Successfully Restore Outdoor Patio
Just like any other flooring process, you require tools and materials to restore your patio. Here’s a list of the things you’ll need.
- A stain
- A sealer
- Anti-slip additive
- A nap roller
- Heavy-duty power hose cleaner
- Rags
- Sprayers
- Overspray blockers (cardboard)
- A saw
- Stiff-bristled broom
Step 1: Cut the Kerfs if You Need Stain Patterns
Cutting kerfs is optional if your concrete floor is already cut or you don’t need any stain patterns on your patio. You use a saw to cut the concrete patio into sections to stain each part with different stain color. Use a piece of chalk to draw straight lines on your patio to indicate where the saw will cut. A board with a straight edge makes it easy to guide your saw and cut the desired straight kerfs. Misting your blade using water will help contain the dust.
Regardless of the extent of the existing damage to your concrete patio floor, you must prepare the surface before giving it a fresh look. Failure to adequately prepare your concrete floor will make it hard for the new materials to bond with it. In most instances, pressure hosing the patio floors gets the job done. But if you suspect that the present dust won’t be easy to remove, use a stiff-bristled broom to scrub the surfaces. You can also increase the pounds per square inch (PSI) of the hosing pump to reach the depths of your concrete. High-pressure hosing ensures that worked-in dust and grime detaches from the surfaces.
Alternatively, chemical etching ensures your concrete patio is properly prepared and ready for the sealer to penetrate and bond with the existing concrete stain. Just remember that any cleaning that involves chemicals should be done with a lot of care lest someone gets hurt. If your floor has paint drops, you can invest in a paint stripper to clean it off. Also, be careful to remove dust and debris from the kerfs.
Step 2: Choosing the Right Hue of the Concrete Stain
There are hundreds of concrete acid stains and water-based stains out there. But you want to go with eco-friendly options that are safe for your plants and pets as well, considering that you might be living on this property already. You’ll find that choosing this kind of stain gives you more control and you won’t have to worry about damaging plants and risking pets and family.
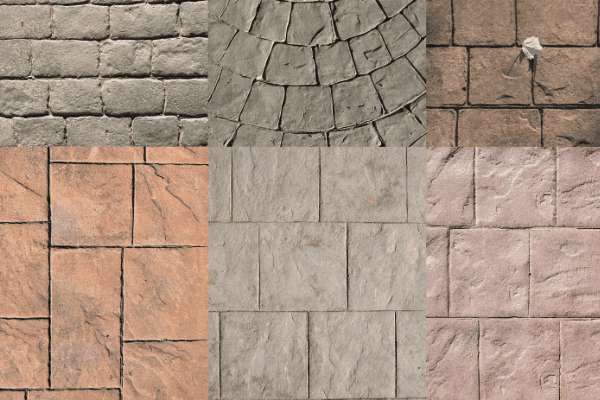
You must also identify the right color of concrete stain. It would help if you have prior information about the previous installation just in case you want a similar hue. Armed with this information, you only go and pick the right color from a local store. If you want to create patterns on your patio, figure out the color scheme first to create attractive installations.
You should test a few stain color options on a hidden area to ensure you use the color that meets your expectations. Select a color that will mask any present marks and one that blends well with the existing concrete stain. Take note that staining only improves the existing colors of your patio concrete and isn’t like paint that will cover what’s on the floor.
Step 3: Apply the Renewing Stain on Dry Concrete
Most patio concretes floors dry in about two and a half hours after pressure hosing. So once your patio floor is dry, it’s time to stain it. We use sprayers to work the stain into the concrete surface and rags to soak up excesses. Depending on the expected results, the application process and patterning might vary. All in all, you should ensure you are getting rich hues that won’t fade after a few weeks. Also, don’t leave behind stain pools. This process might take a few minutes to a few hours depending on the size of your patio and the staining work needed.
Special effects come about when we combine different stain colors. So if you want to integrate special effects onto your concrete surface, take another stain color and spray it on the initial stain while it’s still wet. Blend these two colors using water. The colors will mix and create a marbleized look.
You can also make another attractive floor surface by a color intermix. After applying the first layer of stain, take two different stain colors and spray them at ago while the first coat is still fresh.
With your stain on the concrete floor, you can let it dry and check after several hours if the stain has worked in as you had expected. It’s normal to identify bare spots at this stage. You can touch these isolated sections using a small spraying pump and dabbing them with a rag until the stain penetrates. Do it until it blends in naturally and is uniform with the rest of the concrete patio.
Your concrete stain could be well distributed but you might realize that the stan isn’t deep as you wanted. You can still apply another coat of stain on it until you have the vibrant look you need.
Step 4: Apply Two Layers of Concrete Sealer
To be sure your sealer can bond with the patio concrete, use a few droplets of water to test the porosity of the floor. If it absorbs the water, then the sealer will work well on it.
It’s the concrete sealer that will help protect your outdoor concrete from damage. When you go with a high gloss sealer, you achieve a brighter surface that looks wet. A sealer is best applied when the temperatures are low. So, you should do this the following morning or evening after the sunset when the patio isn’t hot. Again your sealer should be transparent to enhance the look of your concrete stain. You can apply the sealer using a nap roller with a long handle. Though this process looks simple, you must do it with utmost care so that the roller marks won’t be left behind.
After you are done applying the first layer of sealer, wait several hours for it to dry. A day or less is enough for it to dry properly. Mix the second sealer with an anti-skid additive so that your patio floor is not just waterproof but won’t be slippery as well. Then evenly roll the final coat of sealer on the surface. This might take a couple of hours to complete.
Don’t Stop Until You Get the Perfect Staining
Renewing an outdoor concrete slab can be a small project that’s less costly. It can also be an elaborate process that requires several professionals to give it the look it deserves. The simpler option just requires single and uniform staining. On the other hand, you can go with multiple layers of different colors to make your patio a great place to be.
If you are unsatisfied with the results, you should just keep applying different colors until you achieve the hue that appeals to you. Once you are done, give your patio two days to dry before you can start using it.
It might be tempting to acid stain your own patio with the effort of saving money, but not advisable unless you know what you are doing. Get professional help to safely restore your patio and get great results. Southside Concrete Polishing is one of the reliable partners when it comes to staining. We have handled tons of projects and have hundreds of designs in our gallery. Contact us so we can give your patio project a new look.
Share This Post


